

Scratch coat and the use of Bond in plastering work
A scratch coat may seem like a minor layer that eventually disappears beneath plaster and paint, yet the durability of the entire wall finish often depends on it. A smooth, dusty, or poorly prepared substrate may hold the plaster temporarily, but the defects usually emerge later: hairline cracks, hollow areas, or sections that detach when tapped.
The purpose of the scratch coat is not to improve the appearance of the wall. Its role is to create a rough and consistent surface that allows the plaster layer to bond mechanically with concrete or masonry. The material commonly referred to on construction sites as bond is a polymer-based bonding agent that may improve adhesion and mortar performance, but it cannot compensate for a weak substrate or poor workmanship.
Executive Summary
A successful scratch coat depends on five connected factors: a clean and stable substrate, appropriate pre-wetting, a controlled mortar mix, a rough and even application, and curing that prevents rapid moisture loss. Bonding agents should be used according to the manufacturer’s technical data sheet, not according to a fixed site formula applied indiscriminately to every product.
What Is a Scratch Coat?
A scratch coat is a thin preparatory layer of cement mortar applied to concrete or masonry before plastering. It is placed in a way that leaves the mortar grains raised and irregular, providing a mechanical key for the next layer.
On a well-managed construction site, the scratch coat is neither a smooth film that seals the wall nor a thick layer intended to conceal defects. It is a bridge between two different surfaces: the structural or masonry substrate on one side, and the final plaster system on the other.
Why Can Plaster Fail Even When a Scratch Coat Is Present?
The presence of a scratch coat does not automatically mean that the wall has been prepared correctly. It may be applied over dust, form-release oil, loose mortar, or gypsum residue. The surface may appear sound at first while remaining poorly bonded to the substrate beneath it.
In other cases, the mortar contains too much water or is finished too smoothly. It then shrinks as it dries and fails to provide the roughness needed by the plaster. Defects may also begin at the junctions between concrete and blockwork, or around service chases and openings that were not properly closed and treated.
Preparing the Surface Before Applying the Scratch Coat
Surface preparation is rarely visible in completed photographs, yet it often determines the quality of the finished work. Before the scratch coat begins, the wall should be inspected and corrected rather than assumed to be ready.
- Remove dust, loose particles, and weak or poorly bonded mortar.
- Clean concrete surfaces of form-release oils and any substance that may interfere with adhesion.
- Close openings and service chases with suitable materials before finishing begins.
- Treat junctions between concrete and masonry according to the project details.
- Confirm that concealed services are complete and that the wall will not require later cutting.
- Pre-wet absorbent surfaces without leaving free-standing water.
The purpose of pre-wetting is not to saturate the wall. It is to prevent a dry substrate from drawing water out of the fresh mortar too quickly. Excessive suction may interrupt cement hydration, while visible water on the surface may weaken the bond.
The Scratch Coat Mix: Ratio Is Only Part of the Equation
A commonly used site mix consists of approximately one part cement to three parts sand by volume. This proportion, however, should not be treated as a universal recipe. The final performance also depends on sand grading and cleanliness, cement type, substrate absorption, application thickness, climate, and workmanship.
The mortar should be fluid enough to be thrown or sprayed onto the wall, but not so wet that it runs down the surface. Adding excess water may make application easier for a few minutes, yet it also increases shrinkage, lowers strength, and leaves a weaker coat after drying.
| Material | What Should Be Checked on Site |
|---|---|
| Cement | Compliant with the project specification, protected from moisture, and free of hardened lumps. |
| Sand | Clean, well graded, and free from salts, clay, and organic matter. |
| Water | Clean and added only in the quantity required to achieve the correct consistency. |
| Bonding agent | Used only according to the product type, technical data sheet, and intended application. |
| Consistency | A uniform mortar that can be thrown or sprayed and leaves a rough texture without excessive sagging. |
What Is a Bonding Agent?
The term bond is commonly used on construction sites to describe a range of liquid polymer products used as bonding agents or cement-mortar admixtures. These products may be based on acrylic, latex, styrene-butadiene rubber, polyvinyl acetate, or other formulations, and their method of use varies considerably.

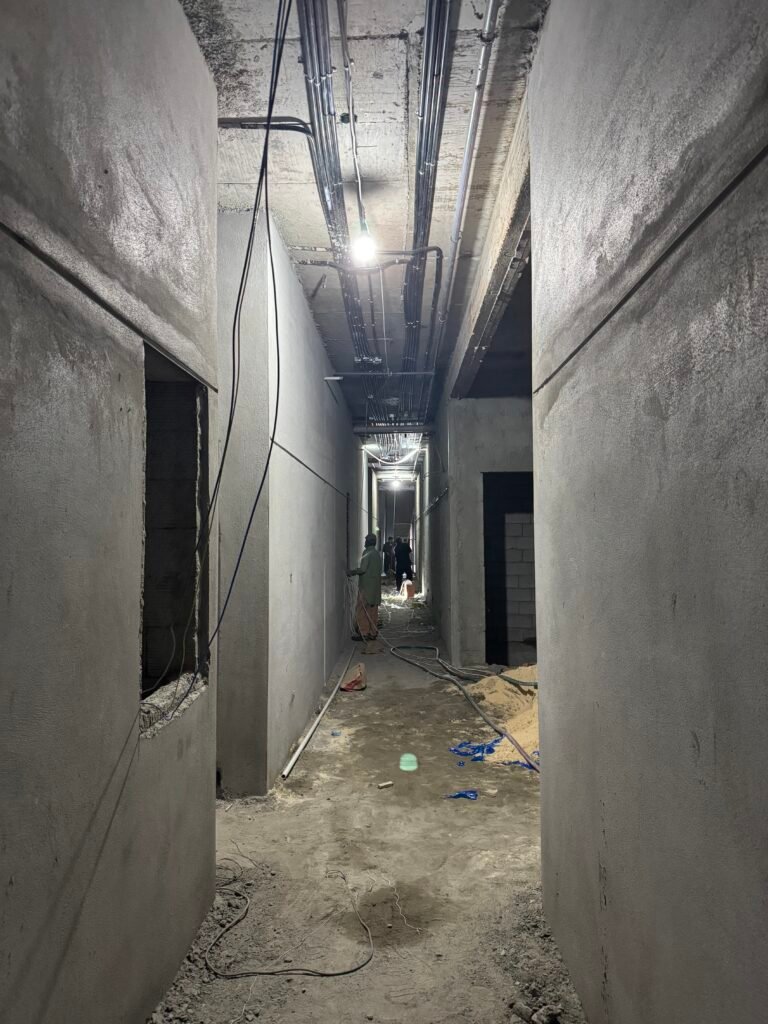
Some bonding agents are mixed with the mortar water. Others are used to prepare a separate bonding slurry before the mortar is applied. Certain proprietary systems are pre-modified and do not require the same additive at all. For this reason, products sold under the general description of “bond” should not be treated as though they all have the same composition or dosage.
Important Professional Note
Do not rely on a fixed rule such as a specific number of litres per drum of water without first identifying the product, its concentration, and its intended method of use. The correct reference is the manufacturer’s approved technical data sheet, together with the project specification and the consultant’s approval.
When Is a Bonding Agent Useful?
A bonding agent is useful when it is required by the approved system or when the substrate presents adhesion challenges, particularly on dense concrete or other surfaces where mechanical bonding alone may be insufficient. The appropriate product may improve bond strength, mortar flexibility, and resistance to water penetration.
It is not, however, a cure for poor preparation. If dust remains on the wall, if the concrete is contaminated by oil, or if the scratch coat is weak and smooth, the chemical additive will not transform defective workmanship into a durable finish.
How the Scratch Coat Is Applied on Site
Once the substrate and mix have been approved, the mortar is thrown or sprayed onto the wall by hand or machine. It should cover the surface evenly while leaving a visibly rough texture. The coat does not necessarily need to conceal the substrate completely, but it should not leave large untreated or smooth areas.
The practical measure of quality is not how the wall looks from a distance, but how well the coat is distributed and bonded. After hardening, it should not powder under light rubbing or detach when checked by gentle tapping or local inspection.
- Prepare a trial panel before applying the system across the project.
- Maintain consistent mix proportions between batches.
- Do not add water randomly after the mortar has begun to set.
- Avoid application on excessively hot surfaces or in dry winds without suitable precautions.
- Protect the fresh work from impact, dust, and contamination.
Curing After Application
Once the scratch coat has been applied, curing begins. This stage is no less important than mixing or placement. Cementitious mortar needs to retain sufficient moisture for cement hydration to continue and for strength to develop gradually.
In hot and dry climates, leaving the coat exposed may cause rapid moisture loss, cracking, or weak adhesion. It should therefore be cured in accordance with the project specification, through controlled water spraying or another approved method that prevents premature drying.
Curing does not mean flooding the wall with a strong water jet that may damage the fresh mortar. The aim is to maintain balanced moisture after the coat has gained enough initial strength to withstand the curing process.
Should the Wall Be Left Before the Scratch Coat Is Applied?
There is no single waiting period that applies to every wall and every project. The correct timing depends on the masonry type, mortar condition, moisture content, temperature, completion of services, and the condition of previous treatments.
The wall should be stable, service chases and openings should be properly closed, and wet works should be sufficiently complete. Finishing should not begin on masonry that remains weak, unstable, or saturated. The project specification and the supervising engineer remain the final authority on timing.
Common Mistakes That Appear After the Finish Is Complete
- Applying over dust: the coat may initially appear stable, then detach with the plaster.
- Using too much water: this produces weaker mortar with greater shrinkage.
- Overusing the bonding agent: more product does not necessarily mean better adhesion and may alter the approved mortar properties.
- Creating a smooth surface: this removes the mechanical key that the scratch coat is meant to provide.
- Neglecting curing: rapid drying increases the risk of cracking and weak adhesion.
- Ignoring concrete-to-masonry junctions: this may lead to straight-line cracks appearing later through the finish.
- Starting plaster before inspection: this hides defects instead of correcting them.
How Is a Scratch Coat Inspected Before Plastering?
A sound inspection does not always require complex instruments. It begins with visual examination, touch, and local tapping, then progresses to project-specific tests or sample panels where required.
- Confirm that the surface has a clear and consistent rough texture.
- Identify smooth, bare, or insufficiently treated areas.
- Check for powdery sections or areas that detach easily.
- Use light tapping to detect hollow or poorly bonded areas.
- Inspect corners, opening edges, and junctions between different materials.
- Obtain approval before the next plaster layer begins.
Does a Bonding Agent Prevent Cracking and Water Leakage?
The appropriate polymer additive may improve certain mortar properties, but it does not turn the scratch coat into a complete waterproofing system, nor can it prevent every type of crack. Cracking may result from structural movement, material incompatibility, poor curing, excessive thickness, or weak detailing.
Where waterproofing is required, an approved waterproofing system should be designed and installed for that purpose. Adding a bonding agent to the scratch coat should not be treated as a substitute for proper waterproofing.
Frequently Asked Questions
Is a scratch coat necessary before plastering?
It is required in many conventional plaster systems, particularly on concrete and smooth substrates, unless the project adopts another approved preparation method or proprietary bonding system.
What is the recommended cement-to-sand ratio?
A common approximate ratio is 1:3 by volume, but the final proportion should follow the project specification, sand quality, application method, and approved plastering system.
How much bonding agent should be added to a drum?
No reliable quantity can be stated without knowing the product, concentration, and intended use. Dosages vary significantly, so the correct amount must be taken from the manufacturer’s technical data sheet.
Can a scratch coat be applied to a dry wall?
Highly absorbent substrates are generally pre-wetted before application, but visible water should not remain on the surface. Some proprietary systems may require different preparation, so the approved method should always be followed.
When can plastering begin after the scratch coat?
Plastering should begin only after the coat has hardened, been cured, inspected, and approved. The decision should be based on the actual condition of the coat, the weather, and the project specification rather than on a fixed number of days alone.
Conclusion
The scratch coat is not a cosmetic step before plastering. It is the connection layer between the building substrate and its final finish. Its quality begins with cleaning and correcting the wall, continues through control of the mortar mix and application, and ends with curing and inspection.
The bonding agent should likewise be treated as an engineered material with a defined composition and method of use, not as an informal additive measured according to habit. When the scratch coat is executed well, it disappears behind the plaster. When it is executed badly, it eventually returns in the form of cracks, hollow areas, and detached finishes.
Technical note: Final mix proportions and application methods are subject to the project specification, substrate condition, approved system, and the technical data sheet of the selected bonding agent. The mix and trial panel should be approved by the supervising engineer before general application.
Explore more technical and architectural articles from INJ Architects.